
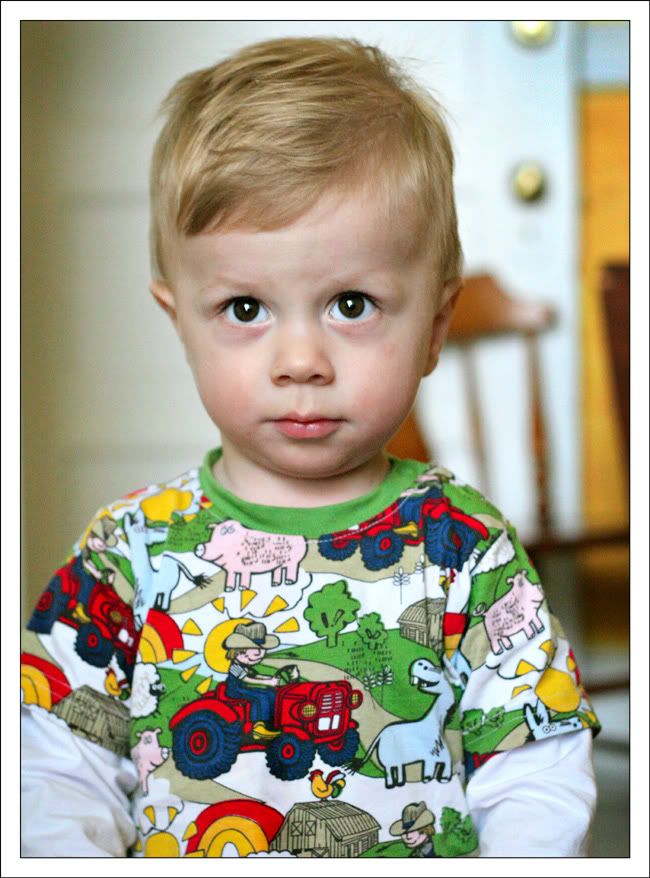
 Doesn't my kid look so great? Big, bright, colorful.... CUTE?
Have you noticed that I like my pictures a bit on the bigger side?
Did you know that if I just uploaded this pic from my computer into my post, the biggest it could get is THIS?
 Boo. BORING. I mean, if you've got GOOD photos, they deserve some room to FLY!
(Contrarily, if you are know for your BAD photos [thumbs in the viewscreen, heads chopped off, etc.], or are not featuring your photography on your blog and are more of a wordsmith, you don't really need this tutorial. So move along.)
But if you have been coveting my big photos, covet no longer. Come, and learn.
But first, I must give credit where credit is due. My own eyes were first opened to the magic of GETTING BIGGER BLOG PHOTOS from a darling, charming photographer I admire, Megan Cristello, who had a great tutorial of her own a couple of years ago. (I'd link it, but Blogger has changed its ways since then, so some of her info is not applicable anymore.)
Okay. Here it is, with visuals.
#1. You are going to need an online photo storage/HTML code generating site. This adds in a couple of extra steps in your blogging, but for the big pics, it is worth it.
Get a Photobucket account. It's free. Or any other photo upload site that provides HTML code. Here is what mine looks like.
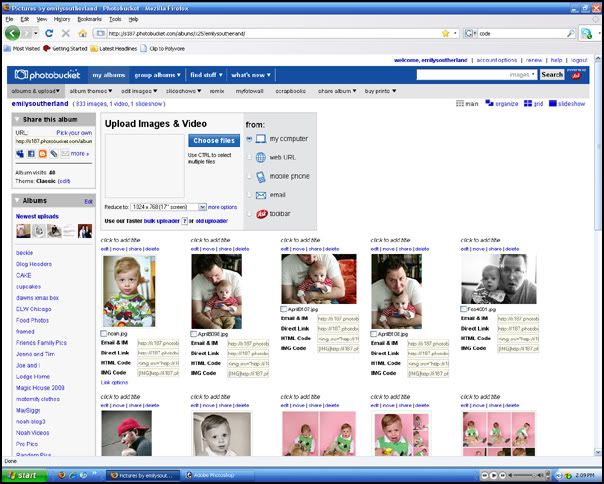 See each photo? Underneath is a set of different codes that can be used on blogs, email, message boards, facebook, etc.
Also notice (click the pic to see it bigger) that above each picture is a list of options (edit/move/share/delete). This comes in handy for step #2.
#2. Resize your image in Photobucket. Click the "edit" button to get to this screen:
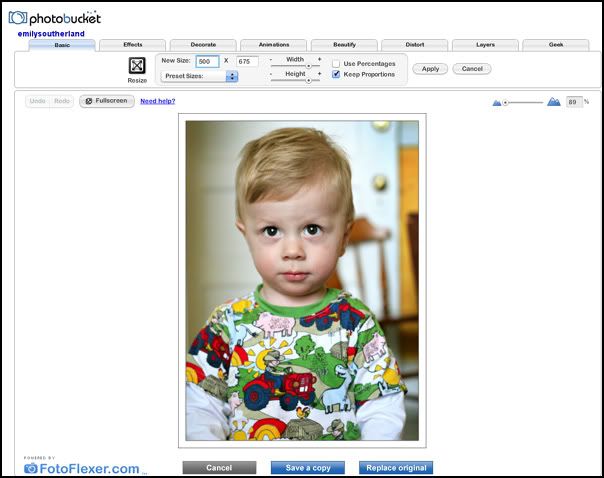 Once in the edit screen, go to the "new size" boxes above the photo (mine says 500 x 675).
*a note-- because Blogger is a vertical friendly layout, your horizontal images will necessarily be smaller than your vertical ones. The photo I posted at the beginning of this post of Noah is HUGE. It is 650 wide by 878 high. If it were horizontal, it would still be 650 wide, but only 445 high. Make sense?
#3. Once you have the size you want, you can either click "save a copy", keeping the original sized one intact, or click "replace original". I usually just replace the original, because I typically don't have use for a HUGE file of the same pic online.
#4. Now you are going to upload you Photobucket photos to your blog post. When you go to your Blogger screen, you'll click the photo icon as usual. But instead of clicking "browse" to get images from your hard drive, you will look to the right and instead be entering the URL of your Photobucket image in the box on the right.
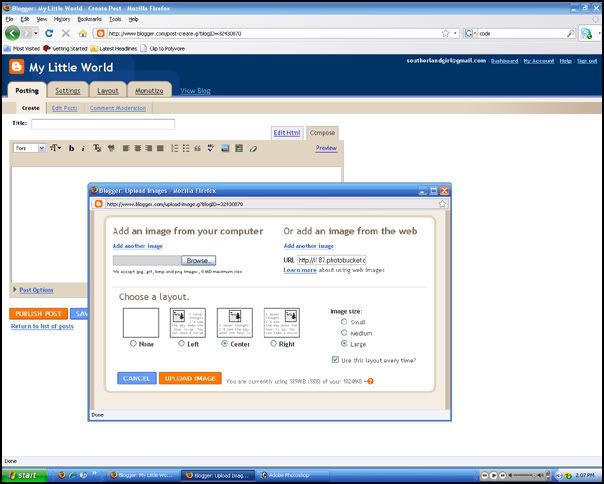 Where do you get the URL? Well, remember the codes under each Photobucket image? Go copy the one that says "direct link" and paste it here. You can do up to five at a time by clicking the "add another image" link. When you have your codes put in, hit "upload". And stand back and be amazed at how much faster your photos load to your blog. Man, HTML is awesome.
#5. Now. Ideally, you now have a gorgeous, HUGE photo on your blog. Ta-da! But one more thing. Sometimes you have misjudged in Photobucket just how big you wanted your photos. Maybe they are TOO big. Or frankly, maybe you were too lazy in Photobucket to actually RESIZE them. Lucky you-- Blogger has a useful trick.
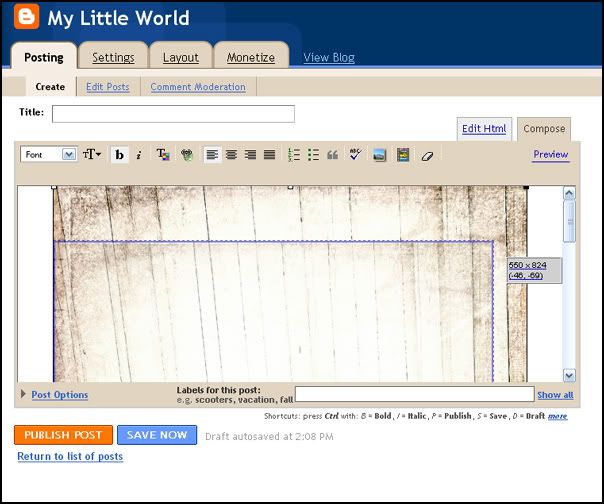 See the numbers in the upper right corner of the photo put in the blog? You can click and hold the upper right corner of your photo and those will appear. That is the size of your picture. You can drag the photo down and it will get SMALLER. AMAZING!
But BEWARE: If you want to make your photo BIGGER, dragging it bigger will not work-- the photo will appear blurry and pixelated. Also, if you have dragged it down too far and it is now TOO small, you cannot go BACK to the original size without some loss of quality in the photo. So use this trick judiciously.
In theory, then, you could just upload full photos to Photobucket, NOT bother to edit them there, and just resize them all in Blogger. The reason I don't? It is more tedious to get that stupid dragged corner to the EXACT numbers I want, and is therefore worth it to me to do the extra step in Photobucket.
And okay, I just lied. Most of the time, I actually do my resizing in PHOTOSHOP before I ever go to Photobucket (making sure to save the smaller photo with a different file name so the original, lovely large file is preserved for printing potential.) I'm sorry I lied. It's just.... well, I want to keep this streamlined for you. Ya know?
Okay. To Summarize:
1. You want BIG photos.
2. You'll need an external photo website that provides code.
3. You'll upload your images there first, then from there to Blogger.
4. You'll resize them to your satisfaction either in the photo program or in Blogger.
5. Your friends will OOH and AAH over your blog's new look-- bigger, fresher, more inviting... And Great Aunt Bethyl can SEE the photos, finally.
6. You'll either keep this new secret to yourselves, or you'll link back here and give praise and glory to me, your helpful teacher. Who in turn gives credit back to Megan Cristello, who taught HER.
Got it? Now, let's enjoy some more BIG photos to end this session, just for fun, and just because I can. Neener neener.
{Noah, when he was less than 36 hours old}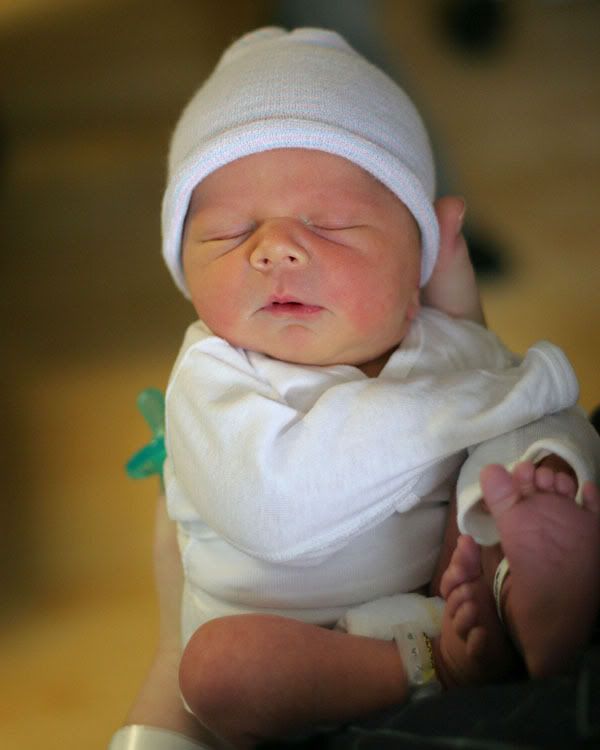
{Venice, 2006. DANG I wanna go back.}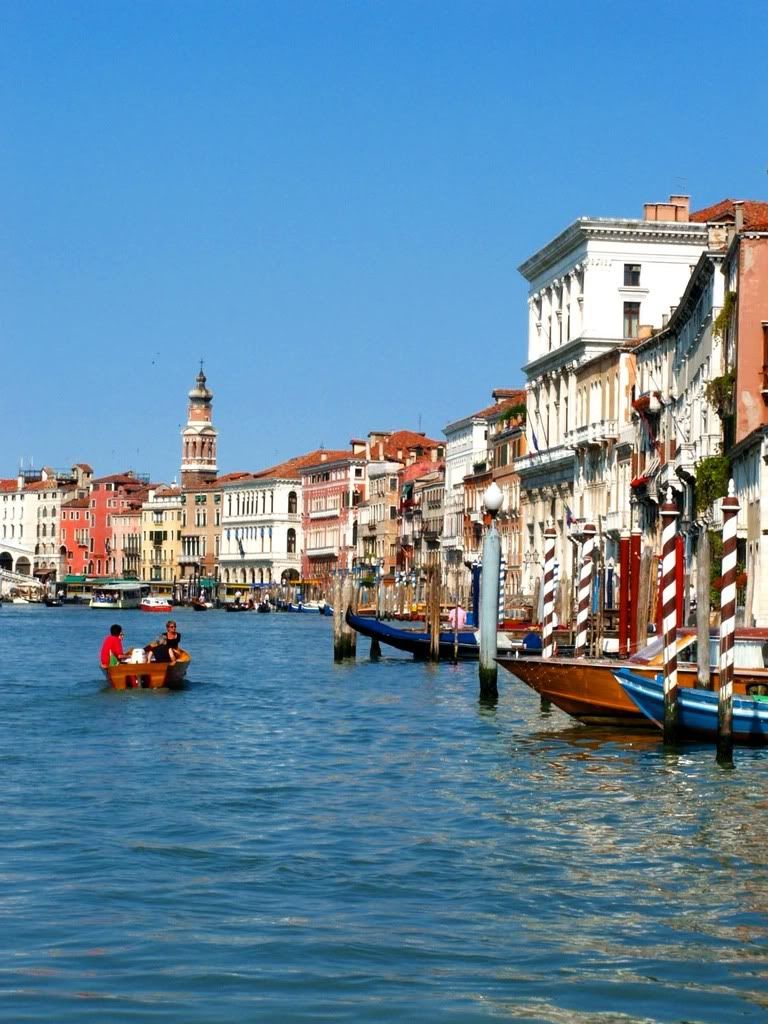
{Cupcakes by me: Circa Feb. 2008. Yum.}
{Cupcakes by me: Circa Feb. 2008. Yum.}
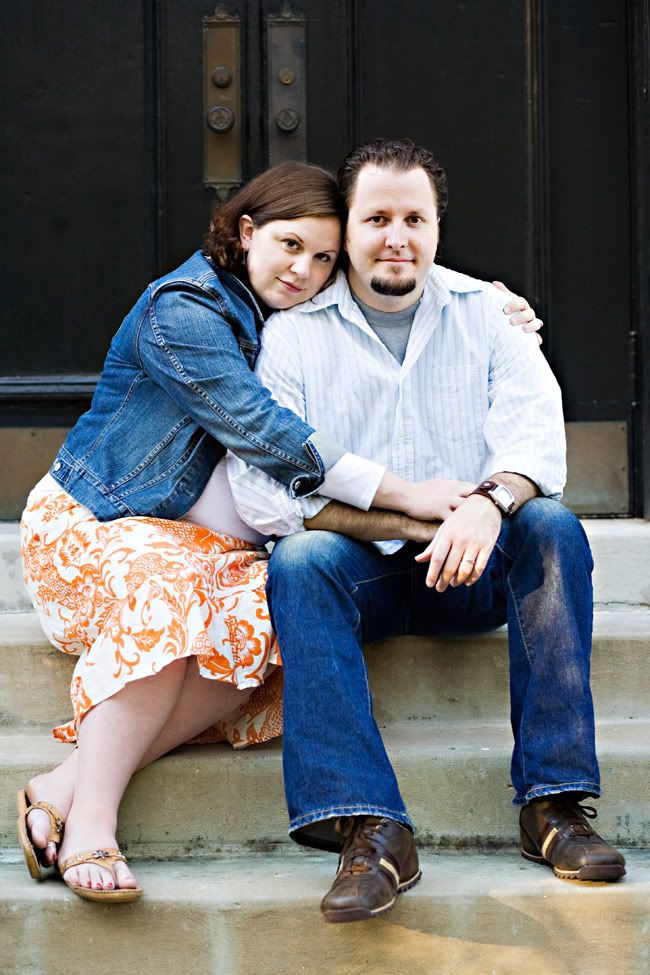
{My beloved and me, October 2007, preggy with Noah}
(oh, and one more fun thing about having a Photobucket account-- all these archived photos from blog posts past... right at my Photobucket fingertips. :) Can I say "Photobucket" any more times? You think the GoogleBots will find me and tell Photobucket and Photobucket will send me a big fat check? Photobucket Photobucket Photobucket???? LOL!)
(oh, and one more fun thing about having a Photobucket account-- all these archived photos from blog posts past... right at my Photobucket fingertips. :) Can I say "Photobucket" any more times? You think the GoogleBots will find me and tell Photobucket and Photobucket will send me a big fat check? Photobucket Photobucket Photobucket???? LOL!)
Emily, thanks for posting the blogger tutorial. I am always looking for help using blogger. You also fulfilled one of my dreams which was to see my handwriting on a word document. So thanks! I found your blog through Melanie Hess who I've never met however Ben Hess is a friend of mine. I admire your photography and your post's!
ReplyDeleteClaudia
Sweeeeet I've been wanting to know how to do this! you are awesome. thanks for sharing!
ReplyDeleteThank you, thank you Emily!! This tutorial was absolutely perfect. Now I'm gonna go crazy posting ginormous images on my blog. I REALLY appreciate the effort you put into this. :)
ReplyDelete~Carrie
Yay, Em!!! Thanks so much for posting this. Now, my good pictures are going to be HUGE. You're SO clever :)
ReplyDeletexoxo
Again Thank You!!! by the way... the photo you sent of Noah is amazing... I've carried it with me ... thank you again
ReplyDeleteYou're awesome. Thanks for helping us all out! I still adore your pictures of Noah each time I see him. Venice looks so beautiful! And I LOVE your skirt. It's so cute. Something that we may not have been able to pick up in our "normal-sized blogger pics".
ReplyDeleteSo, i know this isn't what it's about (and I AM going to do my photos like this from now on, because it DOES make a huge difference) but Noah's farm shirt. . . ADORABLE!
ReplyDeleteMy miracle worker. I've gotten a new Canon camera and it has 12 mega pixels and if I e-mail the image file, it will only hold up to 3 images and then it takes forever for family to download. Thank you, THANK YOU for the tutorial. You always have the best ideas, I try not to ask how you do them all. :)
ReplyDeleteI always loved your pictures but oddly enough made that connection that I couldn't get mine that big. Thanks for the tutorial! Very useful.
ReplyDeleteThanks! Can't figure out why I never thought to give that a shot - but can't wait to use it!
ReplyDeleteLOVE the tutorials! Thank you and keep 'em coming!
ReplyDeleteThank you. Thank You. THANK YOU!!!!! I have been wondering about this for a while now. Next time you will need to tell us how to put together a mosaic, I swear no matter what I do on Photobucket I can't figure it out, maybe it's a photoshop thing?
ReplyDeleteYou can also use the IMG tag and put it directly into your text for big-o photos too...I'll have to try your way next time to test it out.
ReplyDeleteNow, if I could get inspired to blog...
OK, I'll eat my words. I *do* like the resizing.
ReplyDeleteNew trick to add to my bag. Thanks, doll! :D
YOU ARE A LIFESAVER. That little gem about using the url box to upload probably saved my marriage, since I tend to blame any and all computer issues on the hubs.
ReplyDeleteThank you for your generous tip! I have been wondering how to get bigger pics in my blog!!! I can't wait to try it out! Love your photographs and your blog!!
ReplyDelete