Slider

DIY Photo Frame Pinboards: Colorful, Cute, and Easy!

Thursday, August 21, 2014

Looking for a really easy, really inexpensive, but super cute crafty idea, perhaps for  a few of this year's Christmas gifts? How do you like these photo frame pinboards? I made these last Christmas, and I can tell you that ANYONE can do this.

Who's in? 

Photo Frame Pinboards Supply List

1. Photo frames:
Any frame will work, but these are 5x7s and 8x10s from Hobby Lobby. They have the cute shaped ones for about $7-$10 each (after their "frames are always 50% off" deal).

2. White foam core board: 
like the kind you used in school for presentations and things.

3. Approx 1/4 yard of fabric:  
The fabrics I used here are "duck" fabric, a thicker, canvas-like cotton that is often used for indoor/outdoor projects. But regular cotton should work, too. Steer clear of stretchy fabrics.

4. Xacto knife and straight edge with self-healing mat: 
Honestly, scissors, etc., will not work for this. And you'll rue the day you use an xacto without a self-healing mat. If you don't own one, maybe ask a quilter friend to borrow hers?

5. Duct tape: any color

6. Map pins or any other cute push pins

 Procedure:

To start, you'll remove the glass and innards from your frame. Warning-- if you get a frame like that ornate mint one in the first photo, you'll discover AFTER you brought it home that the glass is glued in. Seriously glued in. But your husband might be willing to save the day and hammer/pry it out for you, if you ask nicely. To avoid this in the first place, just check while you're still in the store to see if your frame's glass comes out like most normal frames SHOULD. 

Okay, so once glass is removed, measure the inside area just to be sure it's 5x7" or whatever it is supposed to be. It might be a slightly bigger opening, so getting the measurements right is a good idea. 

Then you are going to take your ruler and a pen and mark a rectangle on your foam core. Make it a millimeter or two smaller than the opening you just measured. Then take your straight edge ruler and xacto knife and CAREFULLY cut out your foam board.

Next, you'll cut a rectangle of fabric that is about 2-3" larger all around than your foam board. This does not have to be precise. Just be generous. Looking at the image above, you'll see some pen parks at each corner. This shows where you are going to cut corners off of the fabric. You don't want them to be right at the edge of the foam board--- you need a few millimeters of room for when you fold the fabric onto itself. Giving this wiggle room keeps the corners from poking out of the fabric as it gets wrapped around. 


Okay. Your corners trimmed and your fabric is ready-- it's time to pull out your duct tape and get that fabric onto your foam board. Start wherever, and tape your fabric in place. It's like wrapping a gift, kind of! The next side you want to tape up is the one directly opposite the first one. This helps maintain tension in the fabric. So do opposite ends first, then turn it and do the other two opposite ends. No need to cover every inch-- just get it so it feels really nice and snug on the other side.


And you're literally almost done. Now you just push this fabric-covered board into the frame, like this:
And at this point, if you want a nice finish, you get to wrestle the back of the frame back on. I have to say, this was, by far, the hardest part of the whole thing. Because the foam board is thick, and the fabric makes it thicker, so in order to get your thin wood frame back to fit back on, it takes some muscle. I shoved one end into the pre-cut groove most frames now have, then just stubbornly muscled the rest of it in with a few choice words and a lot of perseverance. Once the whole thing is in the grooves, these frames have those metal prongs you fold back down to hold it all in place. 

And then, all that is left is to get your favorite photos, or maybe something cute your little one drew for you, or another memento like concert tickets, etc., and use a push pin to tack it to your photo-frame-turned-pinboard. Best part--- it's easy to switch out the things you display, because the fabric masks the pin holes as you change things over time.


And there you go--- because you can use nearly ANY frame, and ANY fabric, these cute pinboards are so easy to match to your style and favorite colors. You can go the shabby chic route with ornate white frames and some floral fabric, or trendy-modern like the chevrons and ikats shown here. You could match one to your baby's nursery. The possibilities are endless! Who on your Christmas list could use one of these?

(Oh, and bonus: if you have a crafty 6-year-old, you can give him your fabric scraps and he'll turn around and make them into "jet robots" with some scotch tape and a lot of inner vision. And then he'll write love notes on them and insist you never throw them away. And you might, if you're a little loony like me, laminate a few of them, just for fun, and actually keep a couple. But that is all super hypothetical.)

*

Q&A: Just For Fun

Wednesday, March 5, 2014


1. Monica asks: "Why do you live where you do and where else have you lived. Oh and a question I ask all the time, people don't realize how high the number is, how many houses have you lived in?"

A: So we are currently living in my in-laws' house, in a suburb of St. Louis, Missouri. We've landed here a little by accident, a little by Providence. We're not yet in a position to buy an house of our own, as Joe finishes a graduate degree that will take him 2-3 more years. We are so completely grateful that instead of squeezing into the size of apartment/townhome we could probably afford right now, we are allowed to spread out a LOT more in a full house for a reduced rent price tag. It's humbling, but such a blessing. And we've worked hard since moving here last summer to make it our own--- to make it feel like HOME. 

In my 36 years, I've also lived: In the University City suburb of STL, in the Central West End neighborhood of STL, in Salt Lake City, UT for a couple of months, in Provo,Orem, and American Fork, UT, in Columbia, MO (four different homes). And I've lived in Woodbridge, VA and back in UT a few different places. 

So let me count: STL (4), UT (7), CoMo (4), VA (1), UT (3)-- 19 total houses, I guess!

2. Jenn asks, "You have become the example of "in the moment" motherhood that I look up to. How do you make sure you don't lose yourself in the day to day, and stay present enough to savor these precious, fleeting baby/toddler/boy moments that are gone in an instant?

Also- can I have Quinn? ;)"

A: Oh, that's tough, sweet Jenn. Well, first, thank you for your amazing compliment! You should know that the flip side of being so "in the moment" is that I kind of lose my mind in many of those "moments". I've always been a hothead-- quick-to-flare, but just as quick to get over it. So as much as I wish I was super ZEN, I'm really not-- I just wing it and feel things deeply on both sides every single day. 

So. Back to your question. I am, by nature, pretty constantly self-aware: so as I'm passing through a day, I CAN'T lose myself because my SELF won't shut up. If things are going well, I'm noticing and patting myself on the back. If things are derailing, I'm watching myself get more frazzled and can't talk myself down with logic. So I am ALWAYS there. But how do I not lose "EMILY" over the days and weeks and months of giving it all up to parent? I think I just try to tap into the things I've always loved, even if it is only a little bit (far less than I used to be able to do)--- creative projects, bluegrass music, solo outings to refill my own well... 

And as for staying present when I'm in the middle of the crazy little-kid world life i lead? I honestly think my iPhoto habit helps a LOT. I'm so deeply sentimental that when a moment happens that I cherish, I mourn the loss of it--- so I grab a photo. I hold onto that moment by doing so. Which turns into NOTICING moments more and more, which turns into appreciating them more and more. Which cycles back into wanting another photo to preserve it all. It's a circle of sentimentality and mindfulness, I guess. :)

Also, you are WELCOME to Quinn for a day at a time, whenever you need him. I just need him back by bedtime. ♥

3. Carrie asks: "If you could have a conversation with one person (dead or alive) who would it be? And where would you like to have this conversation?"

A: This one is HARD. Would I just choose someone funny so I could laugh for a few hours? Would I choose someone wise but potentially intimidating, making it not as fun?  I'm currently so enjoying the words of Katrina Kenison, memoir writer of mothering and post-mothering things.... And I used to devour the words of SARK (boy, she'd be a hoot to hang out with!).... Steve Martin, both of us with our banjos? Yeah. Maybe one of those three. And I'd like to have that convo somewhere comfy, outdoors, in lovely perfect temps... with appetizers. Maybe like one of those outdoor "living rooms" they're always setting up on "The Bachelor". And if it was with SARK, we'd each need a couch, and a pillow and quilt, because I GUARANTEE we'd be taking a nap somewhere in our afternoon together. 

4. Danielle asks: "How did you build up your confidence as a photographer? Are you still afraid you won't get great photos for clients? What about your editing process? Did it take you forever to learn the ins and outs of Photoshop? Do you still love photography as much as you did in the beginning? Sorry, I'm full of questions tonight :)"

A1. Oh friend.... Confidence is about 50% faking it, not even kidding. Then about 25% preparation beforehand (lots of reviewing the ideas I want to try that day, checking my equipment and being ready with plenty of wiggle room), and then 25% just being an extrovert-- small talk and banter come easily to me. That's the short-term answer. In the long term, just practice, practice, practice. Every successful session you have will give you more and more confidence. And being brave enough to ask for constructive criticism, which will SHATTER you, but will, in the long run, teach you and build you until you KNOW you're doing it "right". 

A2. I do still get nervous or anxious before about 85% of my sessions. I think having SOME nerves is good--- it keeps you sharp. If we were all really blase about it all, we'd get lazy and stop thinking of new ideas. 

A3. My editing process is about 80% Lightroom (I do all my culling, color correcting, exposure and contrast fixes here) and 20% Photoshop (I do all my fine-tuning of color and "pop" here, do my B&W conversions here, and do detail work like blemishes and cloning and cleaning up of unwanted things.). I use a few actions, but most of what I do is stuff I've learned over time and have made my own actions to simplify the process. My goal, always, is CLEAN edits, timeless. Nothing too corny that will look dated in just 5 years.

A4. Learning Lightroom and Photoshop has been a work in progress--- I continue to learn. I google a lot, I use my online photography communities a lot. I ask questions, I watch tutorials, I try new things when I have time.... I've come a LONG way, and it's all been self-taught, over a great deal of time. Remember your senior photos? I would edit them totally differently today if I could. Example:


I'm always striving for more and more "classic".... Less and less "gimmicky". Also, you were such a gorgeous model for those photos, they barely needed ANYTHING. :) 

A5. I do still love photography as much as I always have. I feel a little BLAH and uninspired of late, but that is a winter thing, I think, and I have been through it enough times to trust that usually right after a long stretch of "blahs", some BIG growth and progress ends up happening. SO I'm just waiting. haha. 

I'm excited for your journey--- just stay humble, be willing to be broken down so you can rebuild stronger.... and try to be honest and try to be respectful of the legal ramifications of taking money for photos, as well as pricing in a way that doesn't hurt other photographers or yourself in the long run. I recommend practicing for free a LOT until you DO feel confident enough to provide a consistent result. You're on your way, sweet girl!!

5. Tania asks, "I want to know...what was your inspiration for starting your blog?"

A: I love this question. My blog is actually a bit of a relic. Long story: When Joe and I first got married in 2004, we didn't get internet for our new home together. We managed to hold off until 2006. We were relics! So then the end of 2006 came along, and we took the leap. Got REAL LIVE INTERNET in our house. And one of the first things I did? Got hooked on all of my friends' blogs. And decided I wanted one of my own. (My very first post, August 2006: http://emilys-little-world.blogspot.com/2006/08/take-peek-into-my-little-world-plain.html)

I was already a journaler by nature, as well as someone who had always loved online communities. The two things meshed and VOILA, blog. Yes.

I didn't begin it with intention. I didn't have a "theme". I didn't think for a second about monetizing it. I didn't write with an outside readership in mind. Were I to start one NOW-- I'd probably consider all of the above. I think I could be very good at blogging for money. Blogging for audience. 

But that sentimental side of me keeps this just the way it's always been... a journal. My own journey, my little epiphanies, and the things I love.... And I DO have a little readership now, so I do keep that in mind now as I write.... But for the most part, even that doesn't really change what I say. Or how I say it. This is me, transparent, real.... And I love that it's been almost 8 years since I began it. :)

6. Beckie asks: "What is one personality trait you quid hope your friends use to describe you? What is the trait you hope is never used to describe you?"

A: Ah. Interesting. I'll start with the second half. I hope I'm never thought of as a  B****. Honestly. I feel like I work hard to be a peacemaker and a diplomat.... to empathize or sympathize and to try to see things from multiple sides. I don't like the idea of someone being bitchy just to be bitchy, so it would KILL me if I came across that way to anyone. I want to just get wiser and more peaceful as I age.... two things I see as the opposite of bitchiness. 

So how do I hope I AM described? Currently? Gosh. I want to be thought of as funny. I don't know if I am anymore.... too tired to be funny.... Maybe as caring? Though even that makes me look back on this last year of my life and begin to sweat a little: have I even made TIME to be caring to anyone this last year? Am I falling short? I think so. I need to re-strive for more, I think.... Gah!! 

7. Tiffany asks: "What an awesome idea!?! Ok...so...how did you meet Joe? I haven't heard that story yet! What did you do before you were a momma? How many kids do you want or are you done? How did you just become so awesome? We need to get together soon. I need someone to quilt with!"

 A1: I met Joe in the Chesterfield, MO Singles Ward, right here where we now attend church again. He was living right here in the house we live in now.... so we've come full-circle. So weird! I was friends with his sister, and he had been dating someone, so I never even looked twice at him. But when he became single, he asked for advice on who to date, and I was on his sister's list of recommendations.... and the rest is history. 

A2: Before I was a mama, I was a high school English teacher. I taught in the Hazelwood School District for 3 years only.... then left teaching to be a stay-at-home-mom and portrait photographer. At the time, it felt like a huge part of my life, so now that it's been 6 years since I taught, it is weird to see that small number--3-- and realize I didn't really do it very long. Kind of makes me sad. (But not sad enough to go back!)

A3: We would love four kids! Stay tuned. (But not any time soon! I'm just getting my footing with three!!)

A4: I am just so awesome because I take Awesome Pills every day. Just kidding. Let's quilt ASAP. :)

8. Julia asks: "Have you ever thought of writing a book? What would your book be like? Does the idea make you excited or terrified?"

A: Oh man. In my dream future, yes. I'd be writing. I love the idea of being in my quiet little farmhouse, the kids either at school or already grown, and me partaking of a daily morning ritual that culminates in sitting at my desk to hammer out some writing. I'd love to write memoir. I'm not a fiction writer: this I know. I am not a poet. But I'd love to tell stories from life... I'd love it. And I don't know if I'd write to be published, or just write to get better as I also tell my own story for posterity. But yes. I'd love to write a book. And yes, actually, though it is completely part of my vision of the future, it absolutely TERRIFIES me. I'm not very disciplined, so the "now me" would be TERRIBLE at the craft of intentional writing. Not sure how I'll shift into a more disciplined, intentional me.  I'll tuck that away for a time I can face that fear. 

9. Peeser(Elise) asks: "Why do you and Joe have apples on your heads? That's just silly.

Also, why DO you use so many ellipses? Why do I use so many ellipses? Why do WE use so many ellipses? What is the appeal of the ellipsis?

Finally, why do birds suddenly appear every time you are near?"

A: I guess we just felt comfortable enough with Katie to let our true, apple-y selves shine through. The kids were fascinated. 


A2: Ellipses: I just love them. They signify conversational speech, and I feel more comfortable writing in a stream-of-consciousness, conversational style. It probably drives people batty. Ah well. 

A3: Probably because the babies I'm holding are covered in graham cracker crumbs. 

10. Stefanie asks: "Why (or how) are you such an amazing person? You are like the candle to so many little moths... And how to you juggle all the friendships that you've made along the way and still managed to make everyone feel as special as if they're your only friends? You're a special lady, I hope you realize that!"

A: Heart melted, sweet friend. I just read an article about how we need to be better at just accepting compliments-- to teach our children to do the same... without that added, "Thanks, but".... So I will fight that terrible urge to say, "Oh but I'm NOT......" and just say, THANK YOU. It means the world to me that you see me in this light. It gives me peace to think I'm doing some things right. Thank you. And you ARE special, Stef. So so important to me. 

11. Sarah asks: "how much time do you allot per day for screen time / social media? I only ask because I have a hard time with balance."

A: This is a good one, and tough. Because I am as guilty as most women of being too attached to my iPhone/iPad/computer. I am yearning to follow in the HandsFree Mama's footsteps...And over the last year I have gotten better (and then back to worse) at putting the toys down and demonstrating hands-free parenting and living and enjoying of life--- setting an example for my kids I can live with. But the screens are always there, on the periphery, and balance is ALWAYS work. So. Here is what my screen life looks like currently:
I scan the internets first thing in the morning... check email, Instagram, weather, Facebook, texts. Then I put it away and concentrate fully on Noah's prep for school and my morning tasks with the littles--- getting Lucy and Quinn ready and fed. When Quinn goes down for a morning nap, I almost always put on a cartoon for Lucy and get onto the computer or iPad to do work, surf, say hi, etc. Ideally, I'd do something un-screeny WITH Lucy at this time. But realistically, this is rare. Something to work on.... 
I put away the screens when Noah gets home for school and we work on lunch and playtime. Then it is kids' quiet time and I get a stretch of time to get online to work/play/decompress. Some days I forgo this and just take my own nap. Noah gets 1 hour of screen time after his Quiet Time (though it's closer to 2 hours, to be honest.) and I continue to work online. So this stretch, from 1:30pm-4:30pm, is pretty consistently screen time for me if I'm not napping. (I should clarify: for me, screen time and social media time go hand in hand. I flip between work and play the whole time. I almost never dedicate time to only one or the other in once chunk of time.) Then when kids are up from naps and its time to make dinner, I have my phone or iPad handy for recipe referral, which means I'll still check in and read Facebook or whatever at that time. Kids will be playing or watching a cartoon, and Dad comes home to join in whatever they're doing. I keep a "no phones at the table" rule for all meals, and also try to keep screens at bay for the bedtime routines... But after kid bedtimes, it is WORK TIME, and I am on the computer from 8:30pm-midnight almost every night.

I am always working on balance, and trying to keep it to set windows of time.... But on those days when we're all barely managing, I forgive myself and put on another cartoon for the kids and let myself get lost in a jigsaw puzzle on the iPad and we all just let it go and let it be. 

12. Leslie asks: "I've been trying to launch a new business idea for "YEARS", dabbled in the photography craze with no luck but I'm interested to know what your "new business" is that I've read in a previous post."

A: Ooh, I've been planning a "coming out" post, and keep procrastinating it! Haha! So I'll tell you here, and I PROMISE I'll really write that post soon.... where I go into more detail about how I got started, why I got started, and why it is working in my life right now... But for the moment, I'll just answer your question. I am an independent consultant for Jamberry Nails,  a relatively new and really fun company that sells high-quality fingernail/toenail wraps in a million cute designs. I'm totally addicted, and it has been a shockingly unexpected blessing in my life. So there ya have it. I'm "out". I wish you luck as you search for a business that works in your life!!! If you are at all intrigued by this stuff, you can always email me to ask more! Plus, I really DO need to blog a real and comprehensive post about it all..... SOON. 

13. EllanieMae asks: "What got you interested in Jamberry nail products?"

A: Well booyah! Here we are. Okay, I'll tell more. Honestly, it was a fluke. A former photography client of mine was hosting an online Jamberry party, and I was actually bored and clicked the link, and it was like a moth to a flame. "What ARE these pretty things? I don't do manicures, but if they work for toes, I am IN." And the rest is history. I ordered some for my toes, fell in love. Randomly decided to put some on my fingers, fell in love even more, and here we are. 

14. Samantha asks via Instagram: "Ahhhhhhh, I'm late and super vague, but you know I'd love to hear about anything photography!!!!!"

A: Well, lady. I feel like I have nothing to teach you, grasshopper. You are wise beyond your perceived abilities, and could probably teach ME something. :) :) (Guys. You would LOVE this gal. Can I share your blog, Sam?)

But okay. Um. Kid tip: (needs a kind of close lens-- where you don't have to back up to take the photo) Have them give you five. Then shake your hand like it is burning, hurting from their strength, and say, "Oooooh! Ouchie! Ouchie! Ouchie!" 9 times out of ten, you will get the most genuine smiles. Repeat as necessary. If your kid is a gentle soul, don't be too loud or convincing the first couple of times. You will worry them. But get more dramatic once they know your game and trust you. Works on 2-8 year olds like magic. After 7 or 8, they are wise to it and will hide their smiling reaction like their life depended on it.  

(Below: all of these smiles came from this one trick. All within about 1-2 minutes of time with them. The end. Booyah. ) 


*

And DONE! First Q&A complete. Thank you for not leaving me hanging with, like, ONE question. I'm glad there were some of you willing to play along. If anyone feels like they still have a burning question, leave it in the comments and I can either tackle it right there in the comments, or if there are enough additional questions, I'll do this again soon. 

Til then.... Time to spell check this beast and go to bed! (Maybe do an iPad jigsaw puzzle first. My big current addiction.) 

Make a Cell Phone Photo Book: New Year's Resolution, Perhaps?

Saturday, January 5, 2013

Oh my friends. This iPhone of mine is getting a LOT of action in the photo department. It has been so much fun to be able to take my usual "crappy cell phone pics" throughout the day, but have them be... well, better than crappy. And to have some fun editing apps to play with. And frames. (I'm a sucker for frames. Even if that makes me outdated one day.)
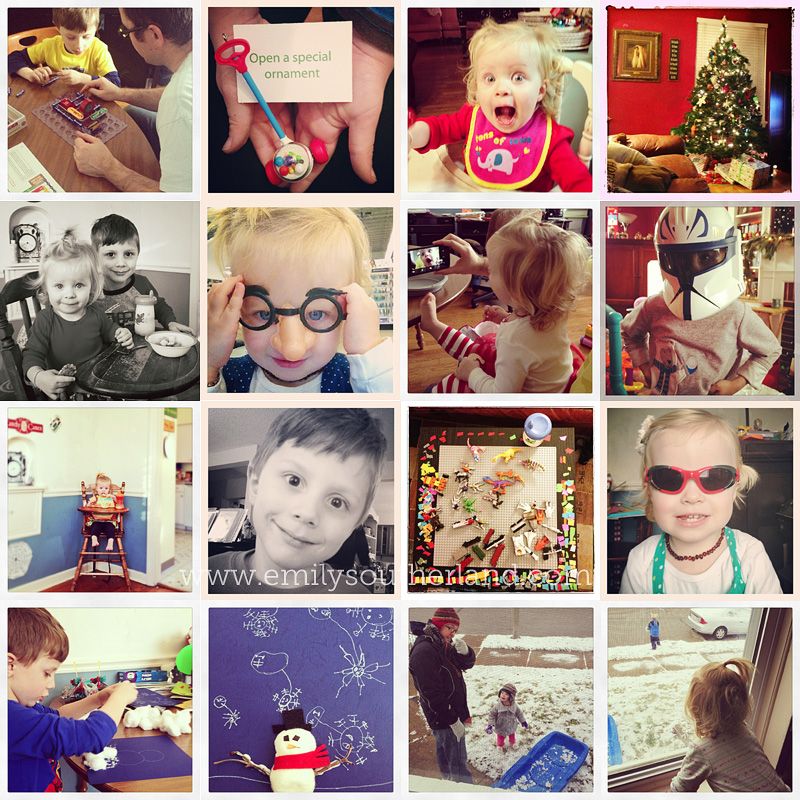
It's just another way I can preserve my personal history, savor moments, wax sentimental, "keep" my memories-- in a life where I am a self-admitted personal history junkie. I still take out the big camera, sure. But for the quick snap--- the one moment I know will pass before I can get the lens cap off, there is nothing like a cell phone camera to grab the moment. Here, a few from the last couple of weeks of December:

Photobucket 
Even at a poorer resolution and quality than a "real" photo, those little gems up there are so special to me. Crappy cell phone photos have always been special to me.

Which brings me to a project I've been making an effort to keep up on--- something I think lots of you might not have even considered trying, but something I personally think is SO worth the few hours of time/effort it would take to get one done.  I'm talking Blurb books, people. Using the fabulous Blurb book website and bookmaking program (free!) to gather and assemble and PRINT your cell phone photos into a little book of their very own.
Anyone following my blog for any amount of years knows I am a disciple of Blurb.com, the bookmaking website. I first used it to create an epic keepsake coffee table book of our trip to Europe in 2006. Another favorite project was making Lamby's ABC Book for Noah for Christmas the other year. And throughout all of these and other  "special projects" using Blurb, I have been working so hard to get my massive quantity of personal photos into yearly books for our family to enjoy--- the modern take on photo albums.

Photobucket

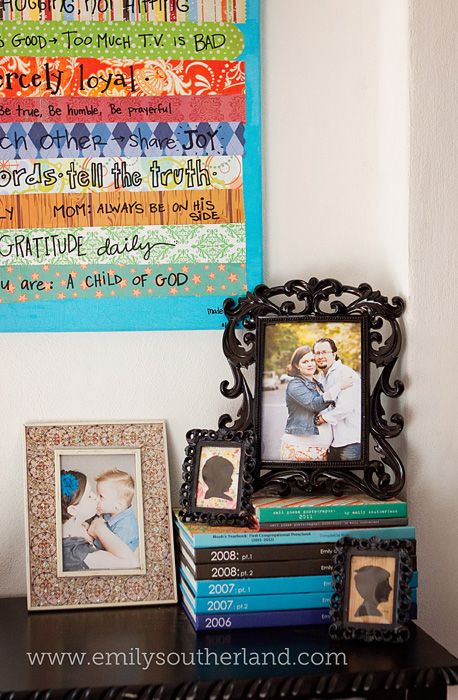
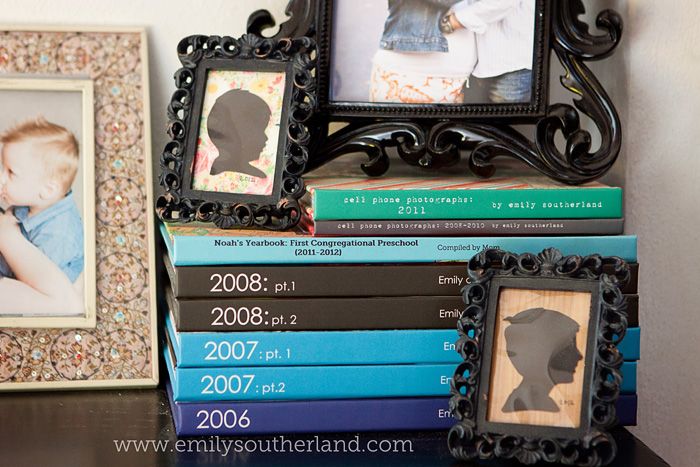
(And here is the burden of my life: I am still 3 years behind on those big books. This is all I've managed to get completed. *sigh* Still, how nice is it to have a stack of at least a few years of photos??)

But those cell phone photos. Especially pre-iPhone, they were, let's face it, pretty crappy. Why clog up a lovely family album with those stinkers? And yet..... what to do with them? Just scan through them on my phone from time to time? What about when the phone crashes or gets wet, and those photos are gone forever? Sure, they were crappy.... but they were special moments.

So I decided they needed a Blurb book of their own. Not a big 8x10 or 12x12 book... Just the small 7x7" size... Something small and no big deal.... but something that got them on paper and into my hands in a more permanent way.

Photobucket

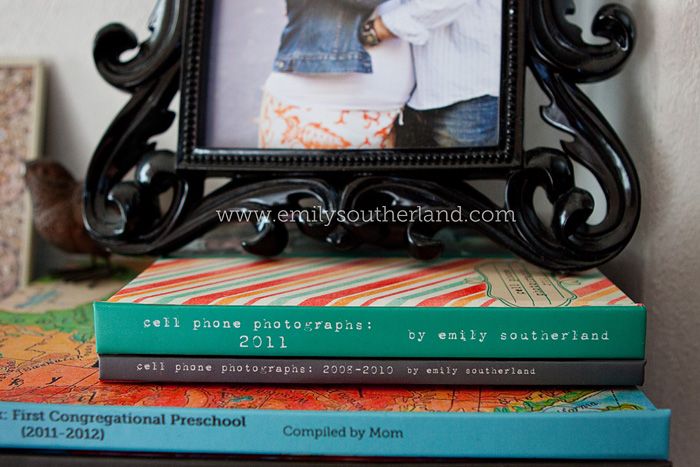
See those very topmost books? Right above Noah's preschool book (that's another project for another day. Let me know if you wanna know about it. It's another marvelous use of Blurb to get things consolidated and preserved. LOVE.)-- those smaller books are my cell phone photo books. AWESOME.

Photobucket 
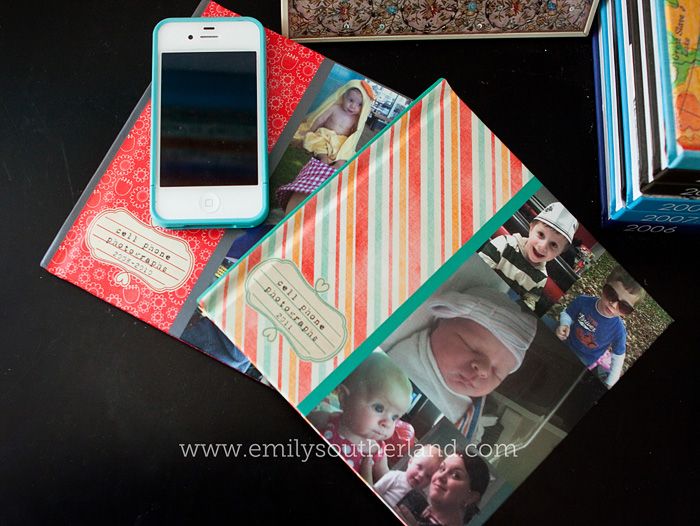
So far, you see my 2008-2010 book (my cell phone didn't have a camera prior to those years, so that's as far back as these books will need to go.) and my 2011 book. I maintained the same cover design for both books and will do the same for the 2012 book--- I love the cohesiveness of it, with small changes made to keep it interesting.

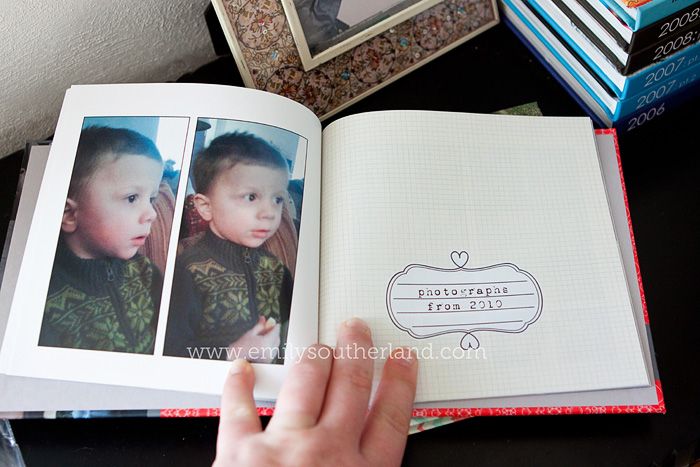
I then added some insert pages that I designed in Photoshop that help organize the photos inside. Not many of them.... in the first book, I just added an insert when the year rolled over from 2008 to 2009, then from 2009-2010. Example: 
Photobucket 
But beyond the covers and those few inserts, everything else is done within Blurb's bookmaking program, Booksmart, and you do not need any other program to work on it. I use Blurb layouts, don't add any fancy stuff, and keep it simple with white pages and thin black borders around some of the photos. (Depending on the layout you choose, Blurb gives you the option to add frames. Some layouts don't have this option. I don't have a preference, so I'll add thin black frames if/when it permits, and shrug it off if it doesn't permit.)

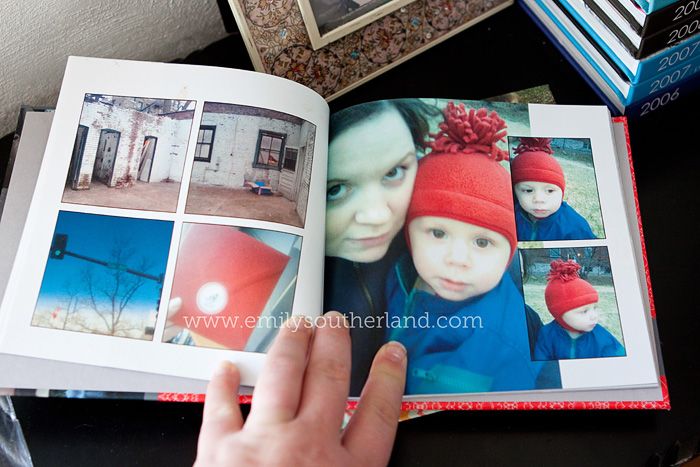
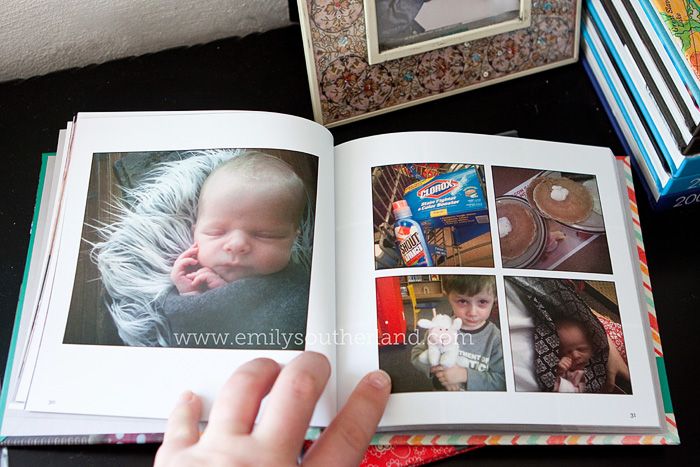
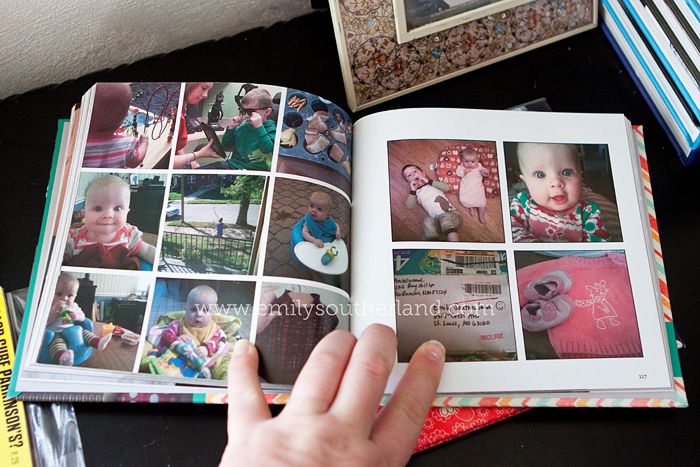
The beauty of these small 7x7" books is that you can cram lots of photos into the pages. They're not high-quality photos anyway, so they don't need full-page bleed treatment. The point is to have them in one place to enjoy, so having lots of small images on one page is fine. And I don't reserve these spots for just the photos I take of people. Any cell phone photo I took, random though it may be, goes into this book--- the next image has: location scouting, new packaging for my biz, a funny street name, and then a walk I took with Noah when he was 10-11 months old. Random. But all tell part of the story.

Photobucket Photobucket
(Anyone else melting at Noah as a baby?  Seems so long ago!!!)

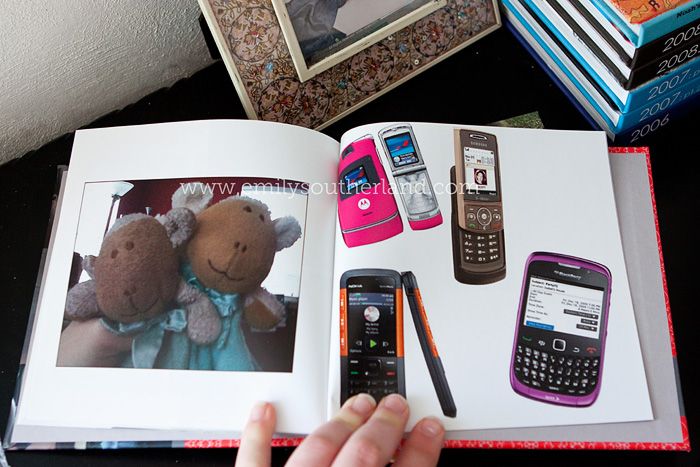
Something funny/fun I then added to the end of my 2008-2010 book was this page:

Photobucket

Those are google-image photos of all the phones I had from 2008-beyond that helped capture the images in the book. The same makes, models and colors. I know that one day this will not only amuse me, but my kids when they see "those old fashioned cell phones from the olden days". It makes me smile to see this page. And again, it is part of the story-- the history.

Photobucket

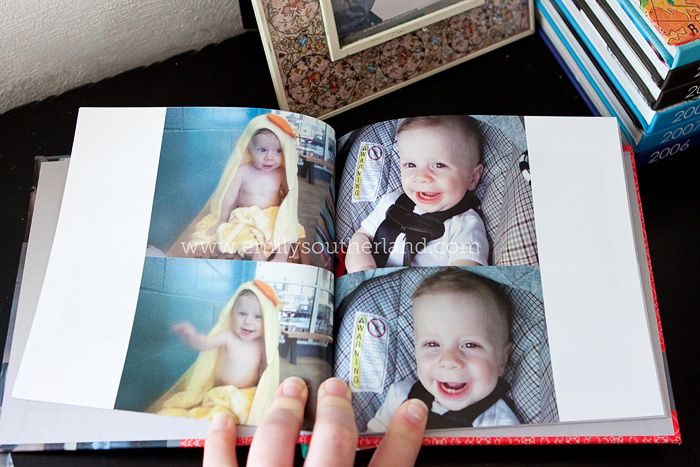
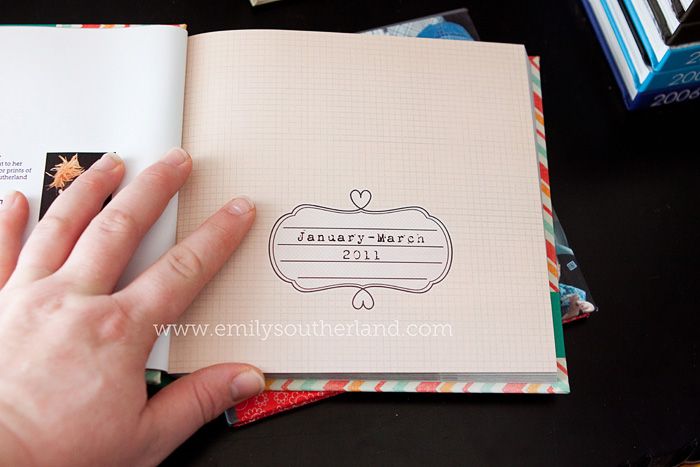
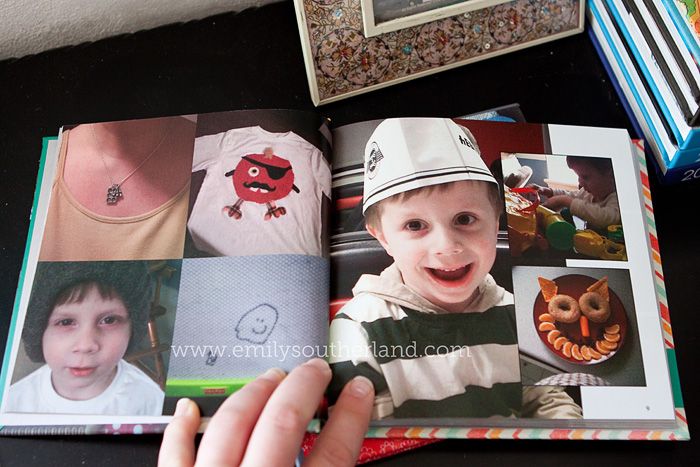
And then a few pages from my second book, the 2011 book. This book is divided by quarter, so the divider pages tell what months are what. At this point, I'd begun taking a LOT more cell phone photos--- particularly once Lucy was born. A friend of mine who'd had a baby just a week before me (Hi, Misty!) would text me a photo almost daily, and I'd text her one back.... we'd share our baby oohs and ahhs and woes that way, and taking more and more photos became a habit. So 2011 got its own book. And a thicker one at that!

Photobucket Photobucket Photobucket 
Lots and lots and lots of moments... Mostly mundane, not worthy of even a paragraph of description... and yet those are the moments that make up the majority of life. The details caught in them--- the clothes we wore, what we ate, where we spent our time.... will be precious to us one day when memory becomes a bit fuzzy.

And though the photos themselves are, in large part, also fuzzy, they are there. And they matter to me.

Do your phone photos matter to you?

Does this seem like something you'd cherish for yourself?

I challenge you to go to www.blurb.com (no they're not paying me. BUT THEY SHOULD. I preach the gospel of Blurb ALL THE TIME. Pay me.) and download their free program, Booksmart. I challenge you to "start a new book" and choose the 7x7 size. I challenge you to upload as many of your cell phone photos as you can get your hands on and begin just dropping them into this new Blurb book. Don't even worry about order or captions or design. Just begin getting the photos into place.

If it starts to excite you-- starts to make you feel like this could be worthwhile.... THEN go back and decide how you want to continue the journey. Add captions? Add divider pages by year or month?  Or just throw a bunch of photos in the book, title it "Cell Phone Photos Since 2007", print it, the end.....Well, that is still going to be one really fun book to have in your home. I promise you.

I challenge you to allow your small moments, seemingly insignificant, to be special enough to put into a real book.

From there--- who knows? You might get the bug. And might suddenly have ideas for 10 more books. (Beware that bug. It comes with a hefty dose of guilt when you don't get them done in a timely manner.)

And to facilitate this project, I am offering to:

1. Make myself available via comment section here to answer your questions as best I can (reminding you that I am not 100% expert in Booksmart, and Blurb is not paying me. THOUGH THEY SHOULD.)
(and reminding you I am great with child and may not be as prompt as we'd all like once he arrives) So leave a comment and check back to see my reply. :)

2. figure out how to make a free front and back cover template available to you for your own use. They'd look just like the ones here, but with masks/spaces for photos and a mask/space for you to use your own digital paper. Someone tell me how to host a PDF or PSD for downloading here? Anyone?

3. Heck, if I can figure that out, I'll make the insert page available for free download, too. You'll only need some PS knowledge to tweak the templates to be specific to your needs.

4. Heck x2-- I'll make a plain 2011, 2012 and 2013 cover available if I can--- just patterned background and title "Cell Phone Photographs 2013", etc. and host them as JPGS so you don't even have to edit them-- just drop them into Booksmart as the cover images. EASY.

5. Because I think these kinds of projects are worthwhile. And immensely rewarding.

And who doesn't love the idea of their own stack of lovely lovely finished Blurb books in their entryway?

Photobucket 
* 
And with that, I'm out of here. I accidentally took like 400 iPhone photos in the month of December 2012 alone. My 2013 cell phone photograph book has some work to be done. YIKES. I'm off to be productive.

Or nap. 

We'll see.

Test Shots

Saturday, March 24, 2012

Wanna see what's on deck for the next blog post? I'll give you a preview--- the "test" shots I took before the real shots.

Photobucket

(second shot adds a reflector to her left... See if you can tell the difference.) 

Photobucket 

Yeah, that's all you get for tonight. Ha. 

See ya next time!

Why Not Shoot In Black and White?

Wednesday, August 4, 2010

Photobucket

Photobucket

Photobucket

I just have a random quick tip for those of you with digital SLR cameras, pro or not.

See, since last October, I switched to full RAW shooting, all the time. I was a JPEG shooter for years, loved it, was sold on it... but the RAW switch was easier than I thought it would be, and I am deeply satisfied with the end results.

However.

I lost two things when I switched:
1.) I lost the easy shooting/instant gratification/simple viewing/sharing capacity of shooting JPEGS when shooting my own personal photos.
2.) I lost the incredibly gorgeous (in my opinion) black and white shooting mode in-camera.

Let me address #2 first.... See, if you guys with the big fancy cameras didn't know, your camera likely has an option in its vast menu to shoot in Monochrome, or in other words, black and white. This is a really cool option for you if you know you'll only need your photos to be black and white-- because the camera won't record any color at all. If you know you'll want both color and black and white of a shot, you have to shoot in the regular mode, then convert to black and white in a photo editing program later.

But sometimes....sometimes you know you just wanna shoot black and white. And while you COULD shoot regular color, then convert later, WHY?? I just switch my camera to black and white right then and there... and the conversion the camera does REALLY makes me happy. Often, I just go into Photoshop later to add a bit of contrast or do a curves layer, but that's IT. No long-winded tweaking. The in-camera black and white is just that good.

However..... the funniest thing happened when I started shooting RAW. I could still shoot that monochrome mode and see the black and white photo in my camera's LCD... but when I brought the file into my computer, opened it in Lightroom, the black and white was gone. It was all color again. Why? Because a RAW file is just that---- RAW. No presets applied, no "in camera conversions", nothing. So when I brought the RAW file to  Lightroom to work on, it was stripped of the black and white frou frou my camera layered on top of the photo to display it in the LCD. It was purely RAW. So.... I lost that black and white loveliness. I'd have to create a conversion in Lightroom or Photoshop. The extra, tedious step was back.

UGH.

So. My (long winded) tip for the day is two-fold:
1. Try out your in-camera black and white. It can be so much fun to shoot in monochromatic and see the world that way. Try it out. Look for textures or moods that might be really enhanced with black and white. Try serious/pensive/truth-telling portraits of your kids or try taking images of small details in your home... Try it out. You might fall in love with the way your camera does black and white as much as I do.

BUT.

2. If you shoot RAW, switch back to JPEG first... just for the blacks and whites. just for fun.

Which brings me to that other dilemma I faced when shooting RAW--- the fact that I lost the simplicity of having JPEGS ready to show/share/enjoy when just shooting my own life. It seemed people were either all-RAW or all-JPEG, so I stuck stubbornly to my RAW switch... and in the meantime, my own personal photos got more and more backed up because they were stuck in this RAW form that needed to be opened in Lightroom/pre-edited/converted to JPG/exported to PS/final edited..... EXHAUSTING. So of course, they never got done. 

But ya know what? WHY be all or nothing?? So...a couple of months ago, I stopped. STOPPED shooting RAW when I knew the photos were just going to be casual shots of my life. I now switch freely back and forth between JPEG and RAW, and I LOVE it. I get to have my personal photos back... within reach, no extra steps needed. So. If you are a RAW purist.... why not try switching to JPEG, just one time, just to feel the freedom? Not with the pro pics you have to have super precise... but just for the playtime with your kids, or the photos of your latest crafty project? Why not?

Anyhoo...

That was rambling. 

Haha. 

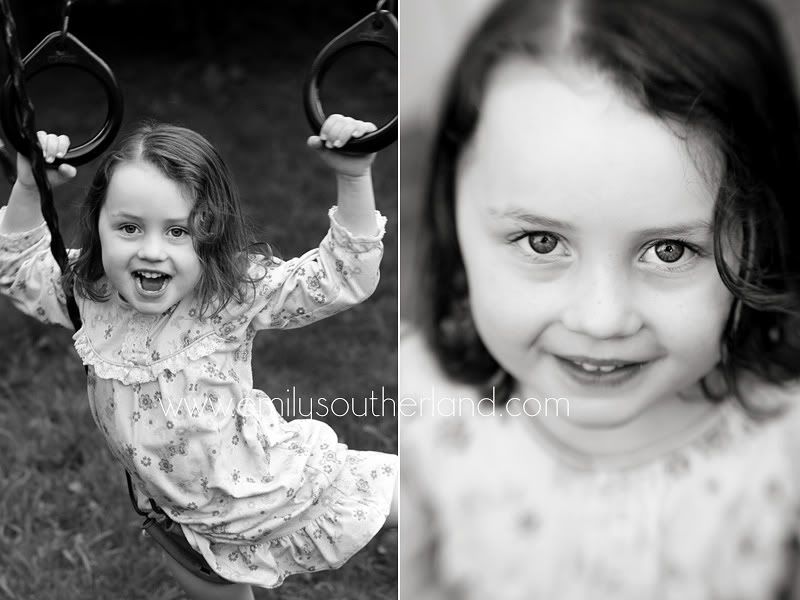
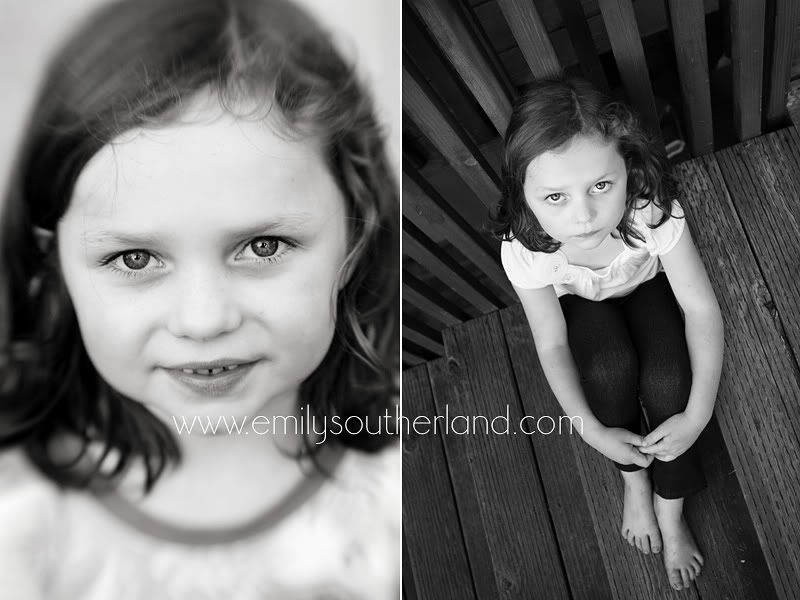
And the photos above are the three spunky kiddos of my old pal Sarah from college days. I got to spend two lovely days with her when I was in Oregon in May. Turns out her town of Vancouver, WA is literally 10 minutes from Portland, OR. Who knew?? So we got to hang out, and her kids got to ham it up for me. Perfect.

This Could Become an Expensive, Addictive Hobby

Wednesday, June 17, 2009

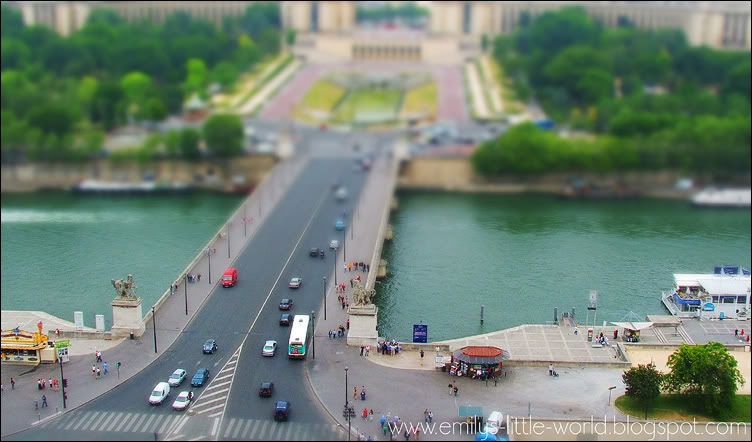
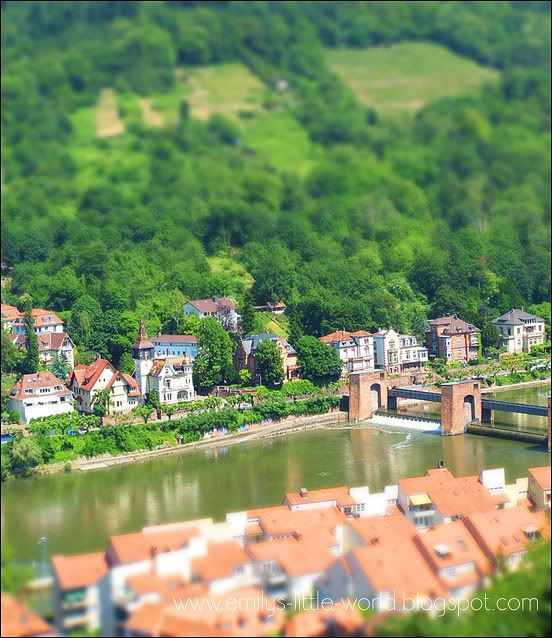
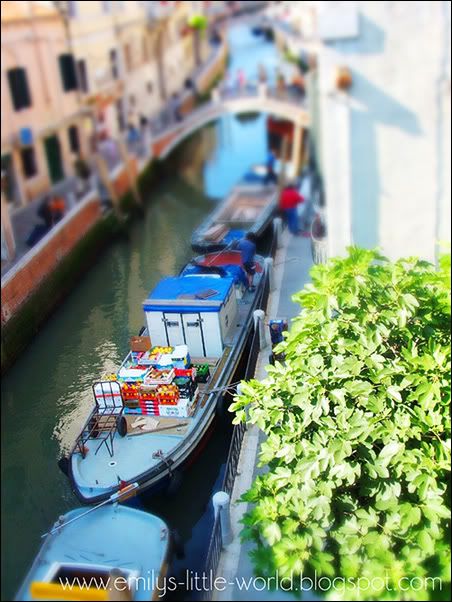
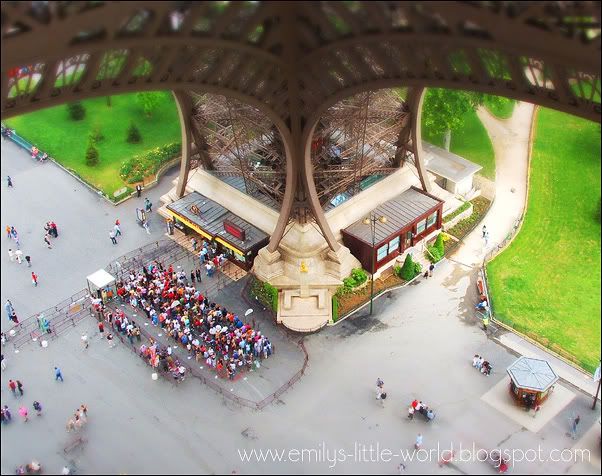
Life in miniature... Tiny people, tiny trees, a familiar setting recreated in a whole new way...
Motion stopped.

{The Trocadero: Paris, France}

Just imagine the money that goes into making miniature models... Train sets, cityscapes... Details. Paint. Tiny little details put in just the right spot.

{Side Canal: Venice, Italy}

It boggles the mind, really.... Magic, manipulative miniaturizing.

{The Eiffel Tower: Paris, France}
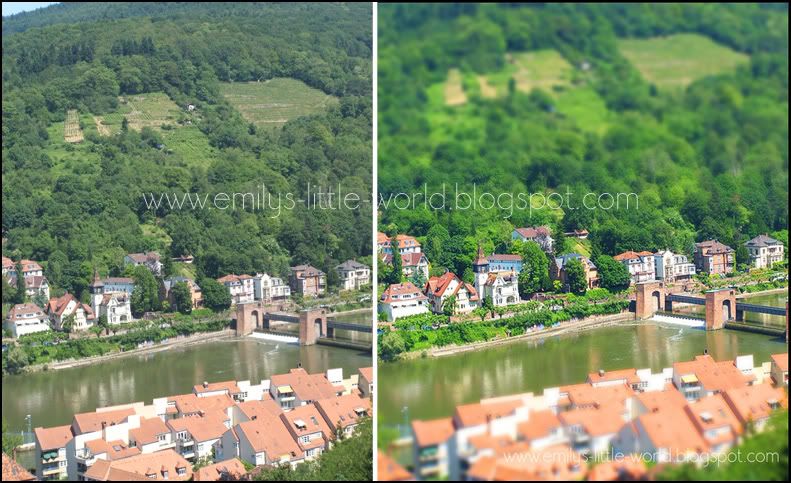
{Heidelburg, Germany}{Heidelburg, Germany}
But.

Maybe there's an easier way. (though no less expensive...)

What about TILT-SHIFT PHOTOGRAPHY?

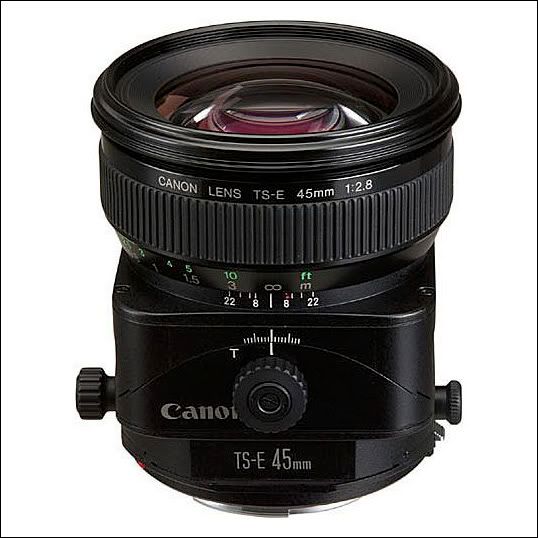
A tricky photographic technique involving this lens:

At only $1200 for the lens, it's a walk in the park, right??!

But for the effect of making gorgeous landscapes and cityscapes take on a whole new surreal, miniature look, why not?

(Here's a good link to some INCREDIBLE examples using this lens:
50 Beautiful Examples of Tilt Shift Photography)

Okay, okay... I'll tell you why not. Do I have $1200 lying around to be spent on a HOBBY lens?!!
Heck no! Phew!!

So.... even better--- how about FAKING it in Photoshop?

Here's my dirty little secret, revealed:

I've been hearing about the tilt-shift lens recently, so I finally took the time to google it. Realized I'd NOT be getting myself one of these incredible lenses any time soon, but started noticing the phenomenon of faking the "look" in Photoshop. And if there's a tutorial out there, I am girl not afraid to muddle through it until I figure it out.

And once I got this one right, I was like a kid in a candy store. SUCH fun!!

I'm thinking of photographing THINGS in a whole new way! I'm ready to go stand on rooftops... The Arch. Balconies. Anywhere I can get some height to try a few new shots to manipulate.

So will this be my expensive, addictive new hobby? Well, for now, EXPENSIVE, no. Addictive?? VERY possible. :)

But if anyone is hankering to get me that lens, my birthday is in 2 weeks.

I'm just sayin'.

*
(P.S. To clarify-- All photos in this post are of REAL places, from Joe's and my trip to Europe three years ago. I just did the tilt-shift tutorial on each of them to make them LOOK like miniatures. Yay!)
*
(There are a ton of tutorials out there, but this one was the breakthrough for me:
http://www.tiltshiftphotography.net/photoshop-tutorial.php... Go play, then tell me about it in the comments. I wanna see YOUR miniatures!)
CopyRight © | Theme Designed By Hello Manhattan