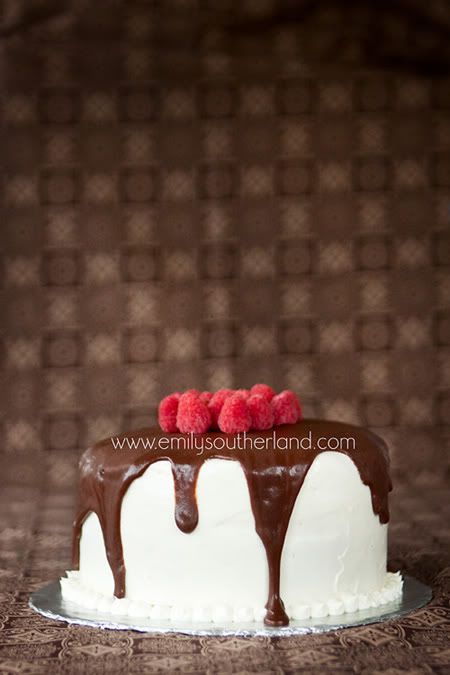
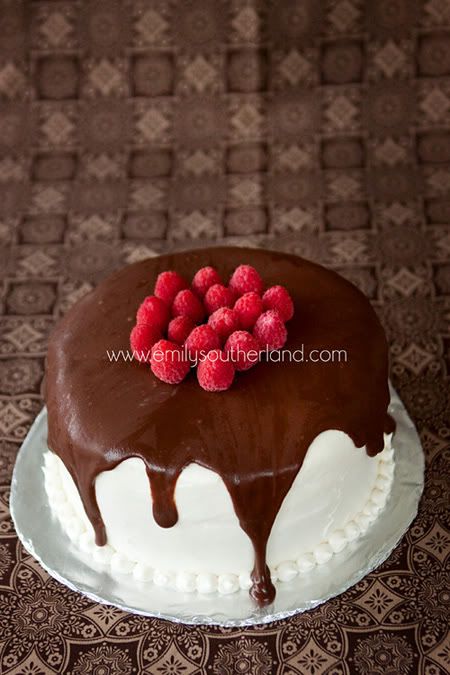
My sweetie requested only one thing for his birthday--- no grand gifts, no big parties... He just wanted cake. He didn't have anything more specific than CHOCOLATE as his request.... He just wanted CAKE.
So.
I pondered cake for a few weeks. Slowly, the ideas came together. First, I saw this wedding cake on Pinterest. Very cool and kinda manly with its chocolate drip effect. I knew I'd be using a Cake Doctor recipe for the chocolate cake--- altered cake mix, so it's not fully from scratch, but also more dense and good than the basic box mix--- and I also knew I'd be using my mom's buttercream for the main frosting. Adding a chocolate drip on top didn't seem too hard, so I had the basics worked out.
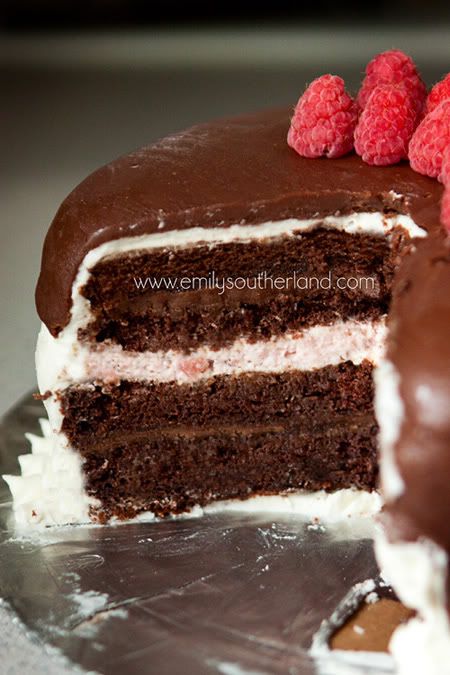
I didn't need to do a tiered cake like the wedding cake-- but I did want a layer cake. I decided on 9" rounds, and after reading one recipe where the girl split her 9" cakes into two thinner cakes, making four thin layers, I decided to do that. Next, I needed to ponder what would fill the layers. Joe LOVES raspberry and chocolate together, so I decided first to do raspberry pie filling between the layers. But the more I pondered that, the more boring it seemed. What about a MOUSSE? Yum!
So this chocolate layer cake became a raspberry-filled, buttercream-topped, chocolate-dripped layer cake idea. And I had my plan. I compiled some recipes to get all the pieces together, and over the course of a few days, I made this craziness happen. There was a LOT of mixing... and I do NOT have a gorgeous stand mixer like many folks do (though I dream one day of a yellow or aqua Kitchenaid on my countertop). So my hand mixer got a LOT of action, and those poor beaters got washed and rewashed a LOT to be used again and again. And after all was said and done, I'll say this-- this cake is not for the faint-of-heart, or for someone wanting a quick and tasty treat. It took time. And effort. And LOTS of love. But I am thrilled with how it turned out. And that thrill was quintupled by the reaction from the recipient... My sweet Joe, whose jaw dropped in just the right way and whose compliments were just the right words.... And I knew I'd hit a home run for my hubs on his birthday.
And that's what counts. :)
So. For anyone who feels the need to replicate this insanity, I have compiled ALL the separate recipes that go into creating this and have thereby made my OWN recipe, free for the trying. Presenting:
Joe's Chocolate Raspberry Vanilla Buttercream Layer Cake with Chocolate Drip
Shopping List
Cake: Devil's Food Cake mix, instant chocolate pudding mix, sour cream, vegetable oil, eggs
Buttercream Frosting: butter, vegetable shortening, milk, vanilla, powdered sugar
Raspberry Mousse: unflavored gelatin, raspberries (fresh or frozen), granulated sugar, eggs, heavy cream
Chocolate Frosting: Baker's semisweet chocolate squares or semisweet chocolate chips, heavy cream, butter, powdered sugar
Step One: Bake the cake. You can freeze this cake for later, so it's okay to make this in advance when you have some time.
Darn Good Chocolate Cake (from food.com recipe here)
1 (18 1/4 ounce) package devil's food cake mix
1 (4 ounce) box instant chocolate pudding mix
1 cup sour cream
1/2 cup water
1/2 cup vegetable oil
4 large eggs
Preheat oven to 350°F. Grease 2 9-inch round cake pans. Dust with flour and tap out the excess; set pans aside.
Place the cake mix, pudding mix, sour cream, water, oil, and eggs in a large mixing bowl. Blend with an electric mixer on low speed for 1 minute. Stop and scrape down the sides of the bowl. On medium low speed, continue to blend for 2-3 minutes more. The batter will be very thick and should look well combined. Pour batter into prepared pans and smooth it out.
Bake for 27-32 minutes (I started checking the cakes at 25 minutes-- it was like gooey chocolate pudding-- then 3 minutes later it was perfect. Another couple of minutes and I think it would have been dry, so keep an eye on your cakes.)
Allow to cool in the pans on a wire rack for 20 minutes. Run a knife along the edges on the cakes pans and carefully remove cake by inverting it; allow to cool for 20 minutes more on the wire rack right side up. When the cake layers are completely cool, cut layers in half.
Blackberry Mousse (I subbed raspberries)
1 teaspoon unflavored gelatin
3 tablespoons cold water
1 cup blackberries
1/4 cup granulated sugar
1 egg white
3/4 cup heavy cream
1 cup sour cream
1/2 cup water
1/2 cup vegetable oil
4 large eggs
Preheat oven to 350°F. Grease 2 9-inch round cake pans. Dust with flour and tap out the excess; set pans aside.
Place the cake mix, pudding mix, sour cream, water, oil, and eggs in a large mixing bowl. Blend with an electric mixer on low speed for 1 minute. Stop and scrape down the sides of the bowl. On medium low speed, continue to blend for 2-3 minutes more. The batter will be very thick and should look well combined. Pour batter into prepared pans and smooth it out.
Bake for 27-32 minutes (I started checking the cakes at 25 minutes-- it was like gooey chocolate pudding-- then 3 minutes later it was perfect. Another couple of minutes and I think it would have been dry, so keep an eye on your cakes.)
Allow to cool in the pans on a wire rack for 20 minutes. Run a knife along the edges on the cakes pans and carefully remove cake by inverting it; allow to cool for 20 minutes more on the wire rack right side up. When the cake layers are completely cool, cut layers in half.
In a small bowl, sprinkle the gelatin over 1 tablespoon of the water and let stand until softened, about 5 minutes. In a blender, puree the blackberries with the remaining 2 tablespoons of water. Strain the blackberry puree into a small saucepan; there should be about 3/4 cup. Add the sugar and bring to a boil. Simmer the blackberry mixture over moderate heat, stirring occasionally, until it is slightly reduced, about 5 minutes. Stir in the softened gelatin until dissolved. Let the mixture cool.
In a medium bowl, using an electric mixer, beat the egg white until firm peaks form. Using a rubber spatula, fold in the cooled berry puree until no streaks of white remain. In another bowl, beat the heavy cream until softly whipped. Fold the whipped cream into the berry mixture and refrigerate until chilled, about 1 hour.
Step Four: Prepare your cake base. You can use a cake platter or a foil-covered cardboard circle like I did. Place a blop of buttercream on the bottom and spread it a bit. This is the "glue" that will anchor your first layer to the bottom. Place your first layer of cake down and center it.
Step Five: Make the chocolate frosting. This will happen right when you are ready to assemble and decorate your cake, since it is a cooked frosting.
Step Five: Make the chocolate frosting. This will happen right when you are ready to assemble and decorate your cake, since it is a cooked frosting.


ummm....one word....YUM!!!!! Excellent job! Joe is one lucky man. ;)
ReplyDeleteSuch Yumminess! I'm pinning it!
ReplyDeleteI would have been a bit worried if Joe *didn't* act stunned at such a creation- not because you are not capable (clearly you are), but simply because it is a stunning creation- beautiful to look at, and I can only imagine how amazing to taste. Of course, some day, I won't just have to imagine how amazing it is to taste- I definitely think this is one to try to make myself someday! :)
ReplyDeleteMy birthday is February 22. Just sayin'.
ReplyDeleteOh my word!!!!!!! This is beautiful!! It must've tasted amazing!!!!
ReplyDeleteHis,
Shari
Oh my word! This looks and sounds so scrumptious! Will you make me one for my birthday. It's not until March, so you have time. ;) lol1
ReplyDeleteMy sister's favorite was the Chocolate Cake that she got from one of her friends. She always talks about it whenever we meet! I’m definitely making this! thanks for sharing!
ReplyDelete