
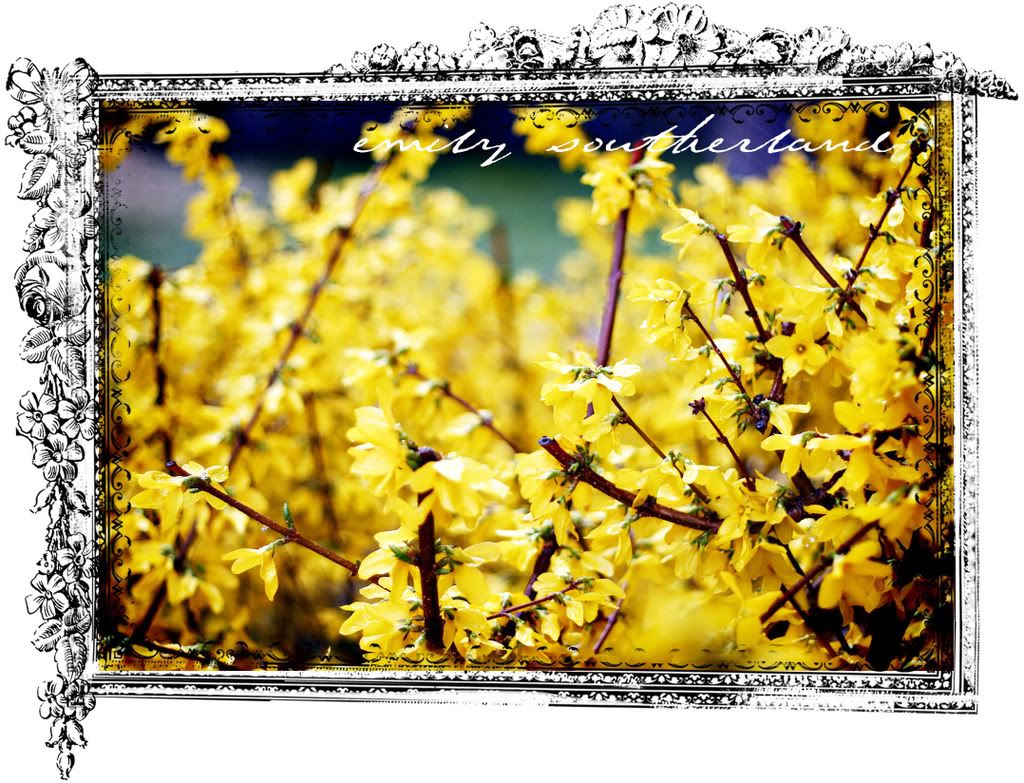
So in my last post, I received at least two requests/inquiries on how to add fun frames to your photos. It is something I started seeing on other favorite photographers' blogs about two and a half years ago, and I've been adding them here and there ever since. And since this activity brings me great joy, and adds a bit o' pizazz to my photos now and again, I thought I'd post a lil' tutorial for you here.
To begin with, all you need is:
1.) Photoshop
2.) a good photo
3.) a digital frame, usually purchased from a digital scrapbooking site online (though you may be able to unearth some freebies online if you look.)
2.) a good photo
3.) a digital frame, usually purchased from a digital scrapbooking site online (though you may be able to unearth some freebies online if you look.)
Basically, these digital frames are created by artists who have way more time on their hands than I do (apparently!!) who them set them up into a collection and make them available for purchase online. When you "buy" these frames, you are paying for the right to download them and you are agreeing not to share the files illegally through pirating. Once payment has been received (usually through Paypal or online credit card transaction), a link is given to you where you can click and upload the digital file to your computer. I save these files in a folder under "My Documents" called "Borders", so I know where to always go to get these frames.

Though I have been finding and purchasing my collection of digital frames for a long time now, I thought I'd save you some of the virtual legwork and give you a few links to some of my favorites, all found on www.twopeasinabucket.com and www.scrapartist.com (and if any of you have any good leads to other sites, please be a dear and leave us the link in the comments!!):
A Few Good Choices:
1.) mostly fancy, artsy HERE
2.) "Schmootzy Frames II", all fantastically over-the-top ornate and FANCY (some of my VERY favorite) HERE
3.) "Schmootzy Frames I", basic raw-edged inky-looking frames HERE
4.) Fun "Toy Camera" frames HERE
5.) More FANCY fun swirled frames HERE
6.) A single colored grunge frame HERE
2.) "Schmootzy Frames II", all fantastically over-the-top ornate and FANCY (some of my VERY favorite) HERE
3.) "Schmootzy Frames I", basic raw-edged inky-looking frames HERE
4.) Fun "Toy Camera" frames HERE
5.) More FANCY fun swirled frames HERE
6.) A single colored grunge frame HERE
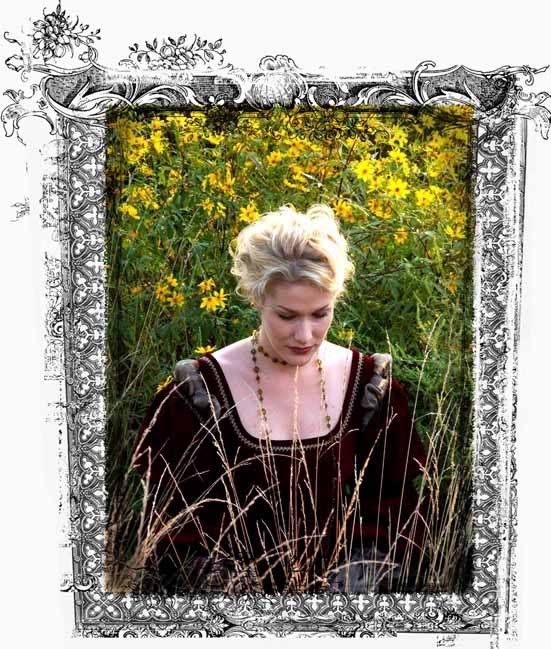
{schmootzy II frame}
{toy camera frame}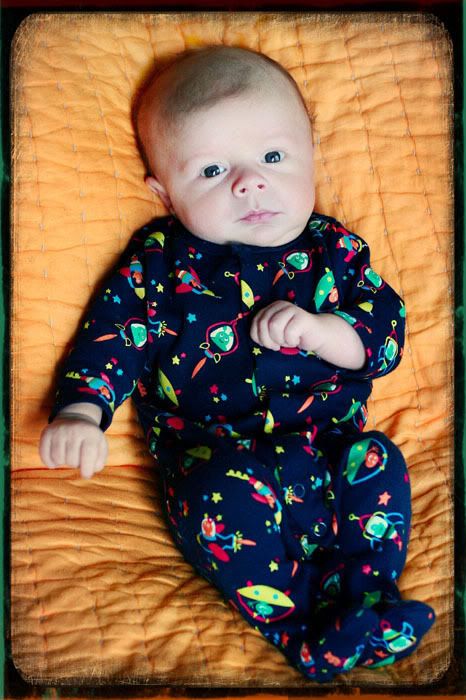
{schmootzy I frame}
{schmootzy I frame}
To actually add the frame to a photo, I do the following steps:
1. Open a photo of your choice and resize it to about 4x6 at 300 dpi
2. Do all post-processing you plan to do
3. Make sure the color swatch on the left tool bar is set so that the white square is on the bottom (See image below)
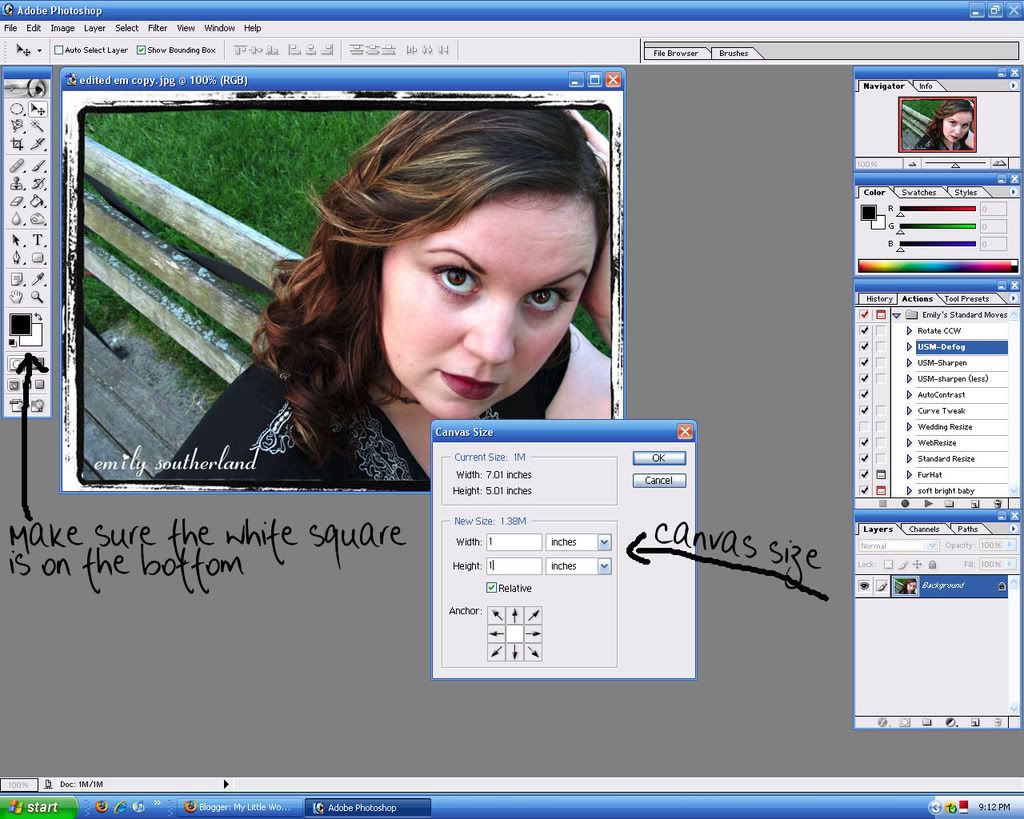
4. Go to Image:Canvas Size and enter in 1 inch wide and 1 inch long (make sure that "relative" is checked). This should give you a white border all around your photo.
5. Now go open one of your new frame files. Using the arrow key, drag the frame onto your already-opened photo. Resize is to fit the photo by dragging the corners/ides until you are satisfied.
6. Flatten the image.
7. If you like, you can then go back and crop out some of the white border you created, or keep it if you like the way it looks.
2. Do all post-processing you plan to do
3. Make sure the color swatch on the left tool bar is set so that the white square is on the bottom (See image below)
4. Go to Image:Canvas Size and enter in 1 inch wide and 1 inch long (make sure that "relative" is checked). This should give you a white border all around your photo.
5. Now go open one of your new frame files. Using the arrow key, drag the frame onto your already-opened photo. Resize is to fit the photo by dragging the corners/ides until you are satisfied.
6. Flatten the image.
7. If you like, you can then go back and crop out some of the white border you created, or keep it if you like the way it looks.
Ta-Da! Your photo now has a funky frame on it!
I would recommend saving your original photo first, then re-saving the framed one under a different name. Some day you may grow tired of the framed look, but if you don't save the original, that digital frame is MIGHTY hard to get rid of!!
Hope this made sense, and I hope some of you go out and try this fun little trick! Feel free to ask questions on the comments. I will respond to them there.
{white grungy frame with wide white border}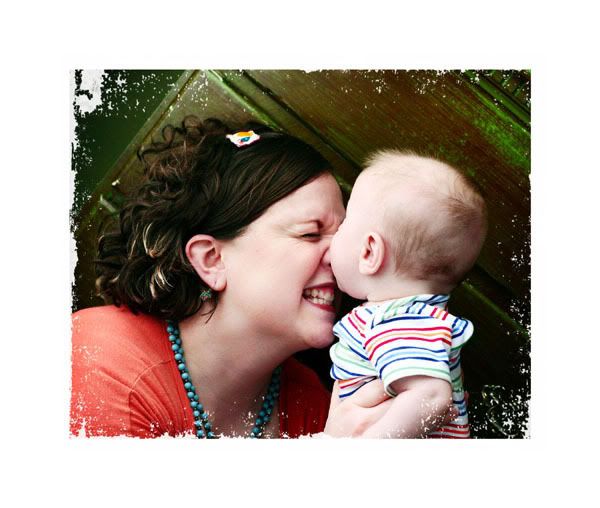
*
and P.S. I have more fun things yet to blog about (like my trip to Richmond, my Girls' Outing, my amazing sister Beckie, etc.).
Soon, my friends. Soon.
Soon, my friends. Soon.
Resizing photos to fit the Facebook Flair application is about as fancy as I get, but I love your frames anyway...esp. that last one. And the photo! Lookit your cute little scrunchy-nosed face! You're as adorable as that kid in your hands, girlie!
ReplyDelete(But I guess that makes sense. Genetics and all.)
Happy 2+[2-half] days left! Yay!
~genny
I am so amazed at your willingness to share. You are so talented. Every time I think about being crafty, I yearn to be you.
ReplyDeleteI love seeing you in all these photos. You are still so beautiful.
Cherish the last moments you have teaching, take tons of photos, and get outta there as soon as the last bell rings!
You've earned it momma. thinking of you. Wish I could be there to help you box up.
Thanks so much for sharing your how to about the frames. I have been wondering about those. I am anxious to give it a try.
ReplyDeleteRe: "could he be any cuter?" I really don't think so. What a little sweety pie. That is such a great picture. Noah is such a doll and you do such a great job capturing him all of your photos.
I am looking forward to reading about Beckie. I hope things go well for her on her new adventure.
Wow! Thanks! I was just wondering how to do this last week when I was reading your blog.
ReplyDeleteHere are a couple of my favorite digi sites at the moment...I searched "frames" on each site for the current style you are using...
http://www.scrapbookgraphics.com/xcart/product.php?productid=21105&cat=0&page=1
http://www.littledreamerdesigns.com/shoppe/index.php?main_page=advanced_search_result&search_in_description=1&keyword=frames&inc_subcat=0&sort=20a&page=4
and love this one ...Nancy Comelab has great stuff and a real sweetheart too...http://www.the-lilypad.com/store/search.php?mode=search&page=1
(sorry I don't know how to put nice, neat links in...)
Thanks for the tips! Maybe someday....until then, I will just admire all your beautiful photos and digi-frames from afar!
ReplyDeleteLove the last pic of you and Noah -- it is the perfect picture of mommyhood.
yum! more fun stuff! you're going to have to talk to my husband if you continue to put things out there that you *know* i'll buy, lol. ;)
ReplyDeletethanks so much for sharing...my computer feels so bare without all my old ps tools...this will inspire me to go 'rootin' around for more ps toys!
THANK YOU!! I am not computer savvy by any means but you have given me the confidence I'll need. WISH ME LUCK!! Oh, and Em, Noah is a BEAUTIFUL little baby!
ReplyDeleteWow, thanks for sharing. I love the last picture of you and Noah. It captures the joy of motherhood.
ReplyDeleteThanks so much! I might call you with questions! Do you mind if i put the url on my blog of your photography site?
ReplyDeleteOh ank you ank you!! I needed those links. You are too precious!
ReplyDelete